Was messing around with this tutorial by Caskel and just pushed it ever so slightly further by adding motion blur to the particles in Redshift. Just kinda following along so not that different than the the tut. Kinda a relaxing little piece though. Really great tutorial as well.
Houdini - Redshift - Spiderweb - Project walkthrough
This is good to have handy in case anyone needs some creepy-pasta added to their renders. Cool solution as well.
Quixel Bridge fix for Houdini/Redshift (Update)
New update to make Quixel behave better with Houdini and RedShift was just released on Denes Dankhazi's Blogfolio. Gotta love anyone with “dank” in their name you know. Get the RedShift fix Here.
Basically, Quixles textures come in wrong, especially the displacement and this fixes that. Wrong might be the incorrect way as it’s fine in Unreal, just a RedShift implementation in Houdini is odd I guess?
“The Quixel Bridge fix for Houdini/Redshift.
For Houdini, I changed the 3D Asset, the 3D Plants and the Surfaces part.
How to use it:
Install the latest update (4.5) for Houdini in Quixel Bridge
The plugin path is something like this: Megascans\Library\support\plugins\houdini\4.5\MSLiveLink\scripts\python\MSPluginDownload the files and replace the original ones: download
ImportSurface.py goes to the AssetImporters folder
Import3D.py goes to the AssetImporters folder
ImportPlant.py goes to the AssetImporters folder
Redshift.py goes to the MaterialsSetup folder
The changes are significant
Subdiv settings
Shader settings
and most importantly Color Management settings for the RS Texture nodes
Without this you can’t render correctly anything.
Now the colors are using sRGB and everything else is linear as it should be.
You still have to fix the Displacement EXR textures thou.
Open in Photoshop (for example)
You’ll see there is data only in the red channel
Copy that as an the RGB layer and merge (Ctrl+E)
Sometimes you still have to linearize the data, use the exposure adjustment layer with gamma 0.454
Cheers, D”
Mixer 2021 Deep Dive: Multiple Texture Sets
Since adobe bought out Substance Designer I have been messing around with Mixer occasionally. I use Bridge and Megascans all the time but have not really dug too deep into the integration and customizing you can do with Mixer. The new 2021 update seems to add a lot more functionality though that has me more interested in messing around more. The siren song of real-time rendering with Unreal is growing stronger as well….
Random Bevel in Houdini
Some things in Houdini are just stupid simple to do, this 1-minute tut from Simon Houdini is just pure gold. His whole channel is pure gold FWIW.
I never knew about the “Exclusions > Ignore Flat Edges” option in the PolyBevel node…. yeesh!
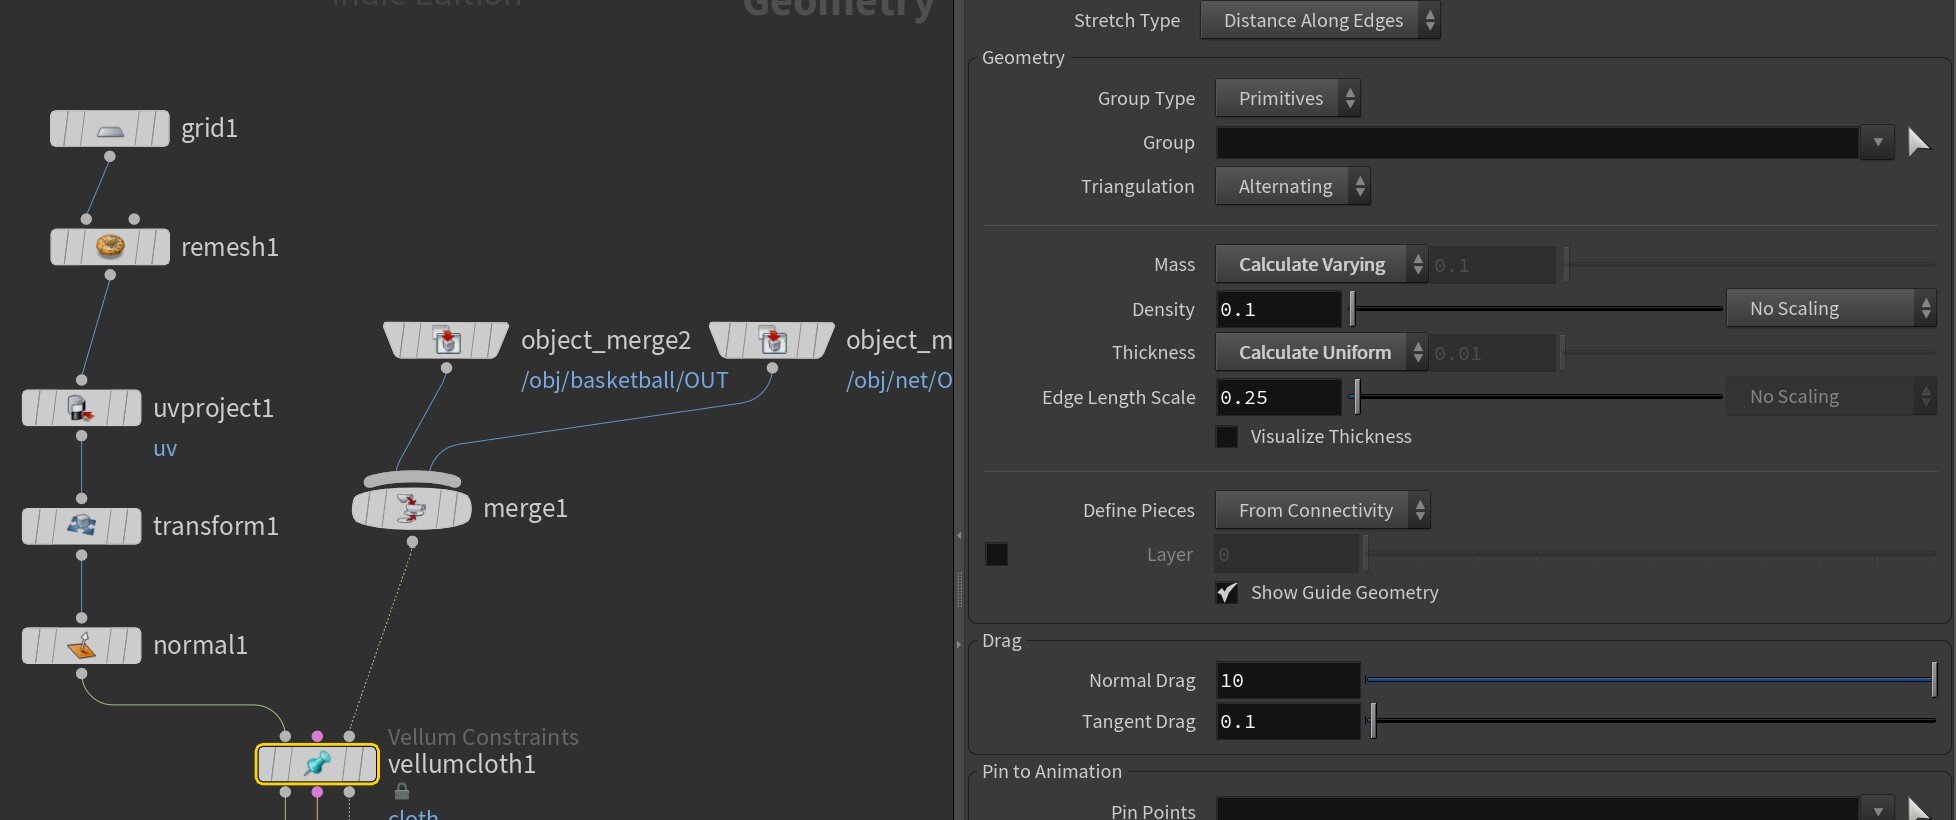
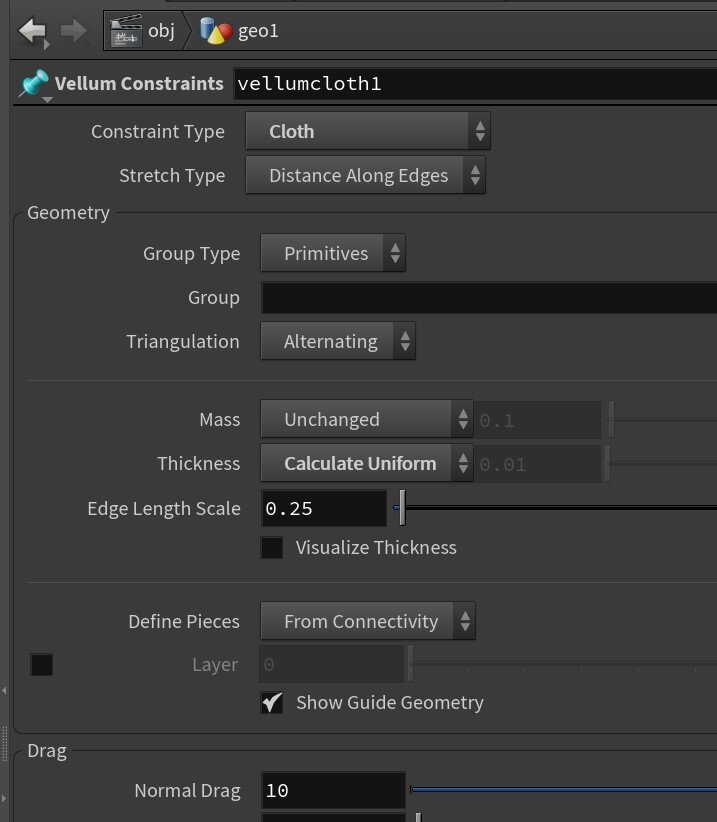
Houdini Vellum, random pins in simulation
Ran into a little bug messing around with vellum where it looks like pins are set to the cloth even though I have no pins set.
The way to fix is to go into vellum node and change “Mass: Calculate Varying” to “Mass: Unchanged”. That will unstick them.
Wacom Cintiq Fan is too loud.
How to turn the fan on your Cintiq down. Some new update set mine to jet airplane levels of loudness. Here is where the setting is buried.
Epic Bought Artstation?
Wild, Epic Games just bought Artstation. I find what they are doing very interesting. Bought Megascans and Capturing Reality and now Artstation… hmmm….
And they made their learning portal free for the rest of the year.
“ArtStation Learning is free for the rest of 2021.
We’re also making ArtStation Learning free to all members for the remainder of 2021. ArtStation Learning is our streaming video service for artists. It features unlimited access to an ever-growing content library from industry professionals. Artists can expand their skills in a wide range of art topics and learn at their own pace. Head over to artstation.com/learning to get started.”
Naturalistic lighting from Andrew Wyeth in CG
These two did another project where they figure out the lighting of an artist in CG. This one is on Andrew Wyeth. My big take away was to start using modifiers on my lights. Kind of a forehead-slapping moment.
When I light stuff in the studio the first thing I do is decide what kinda modifier I am gonna put on the light. Strip box with a grid? Projector with a grid? Beauty dish? Well, in CG I just grab a naked light and start aiming it like a scrub. It will be interesting to mess around with diffusion and more modifiers.

Learning Caravaggio Lighting Techniques
This is pretty cool to watch. A CG artist and a Director of Photography do a zoom call and go through lighting a scene in Caravaggio’s style. It’s in C4d and Corona, but it translates to pretty much anything. It’s interesting how the DP calls out real world lights and flags and where to put them. It’s not anything crazy new, but the discussion and the iterations they have going on is what I found the most interesting.
Photo Bashing Ideas
Found a pretty awesome breakdown on doing some photobashing that is really well thought out. Not just the technique, but the ideas behind why to use the technique. Interesting little vid that has me thinking about the full class to be honest.
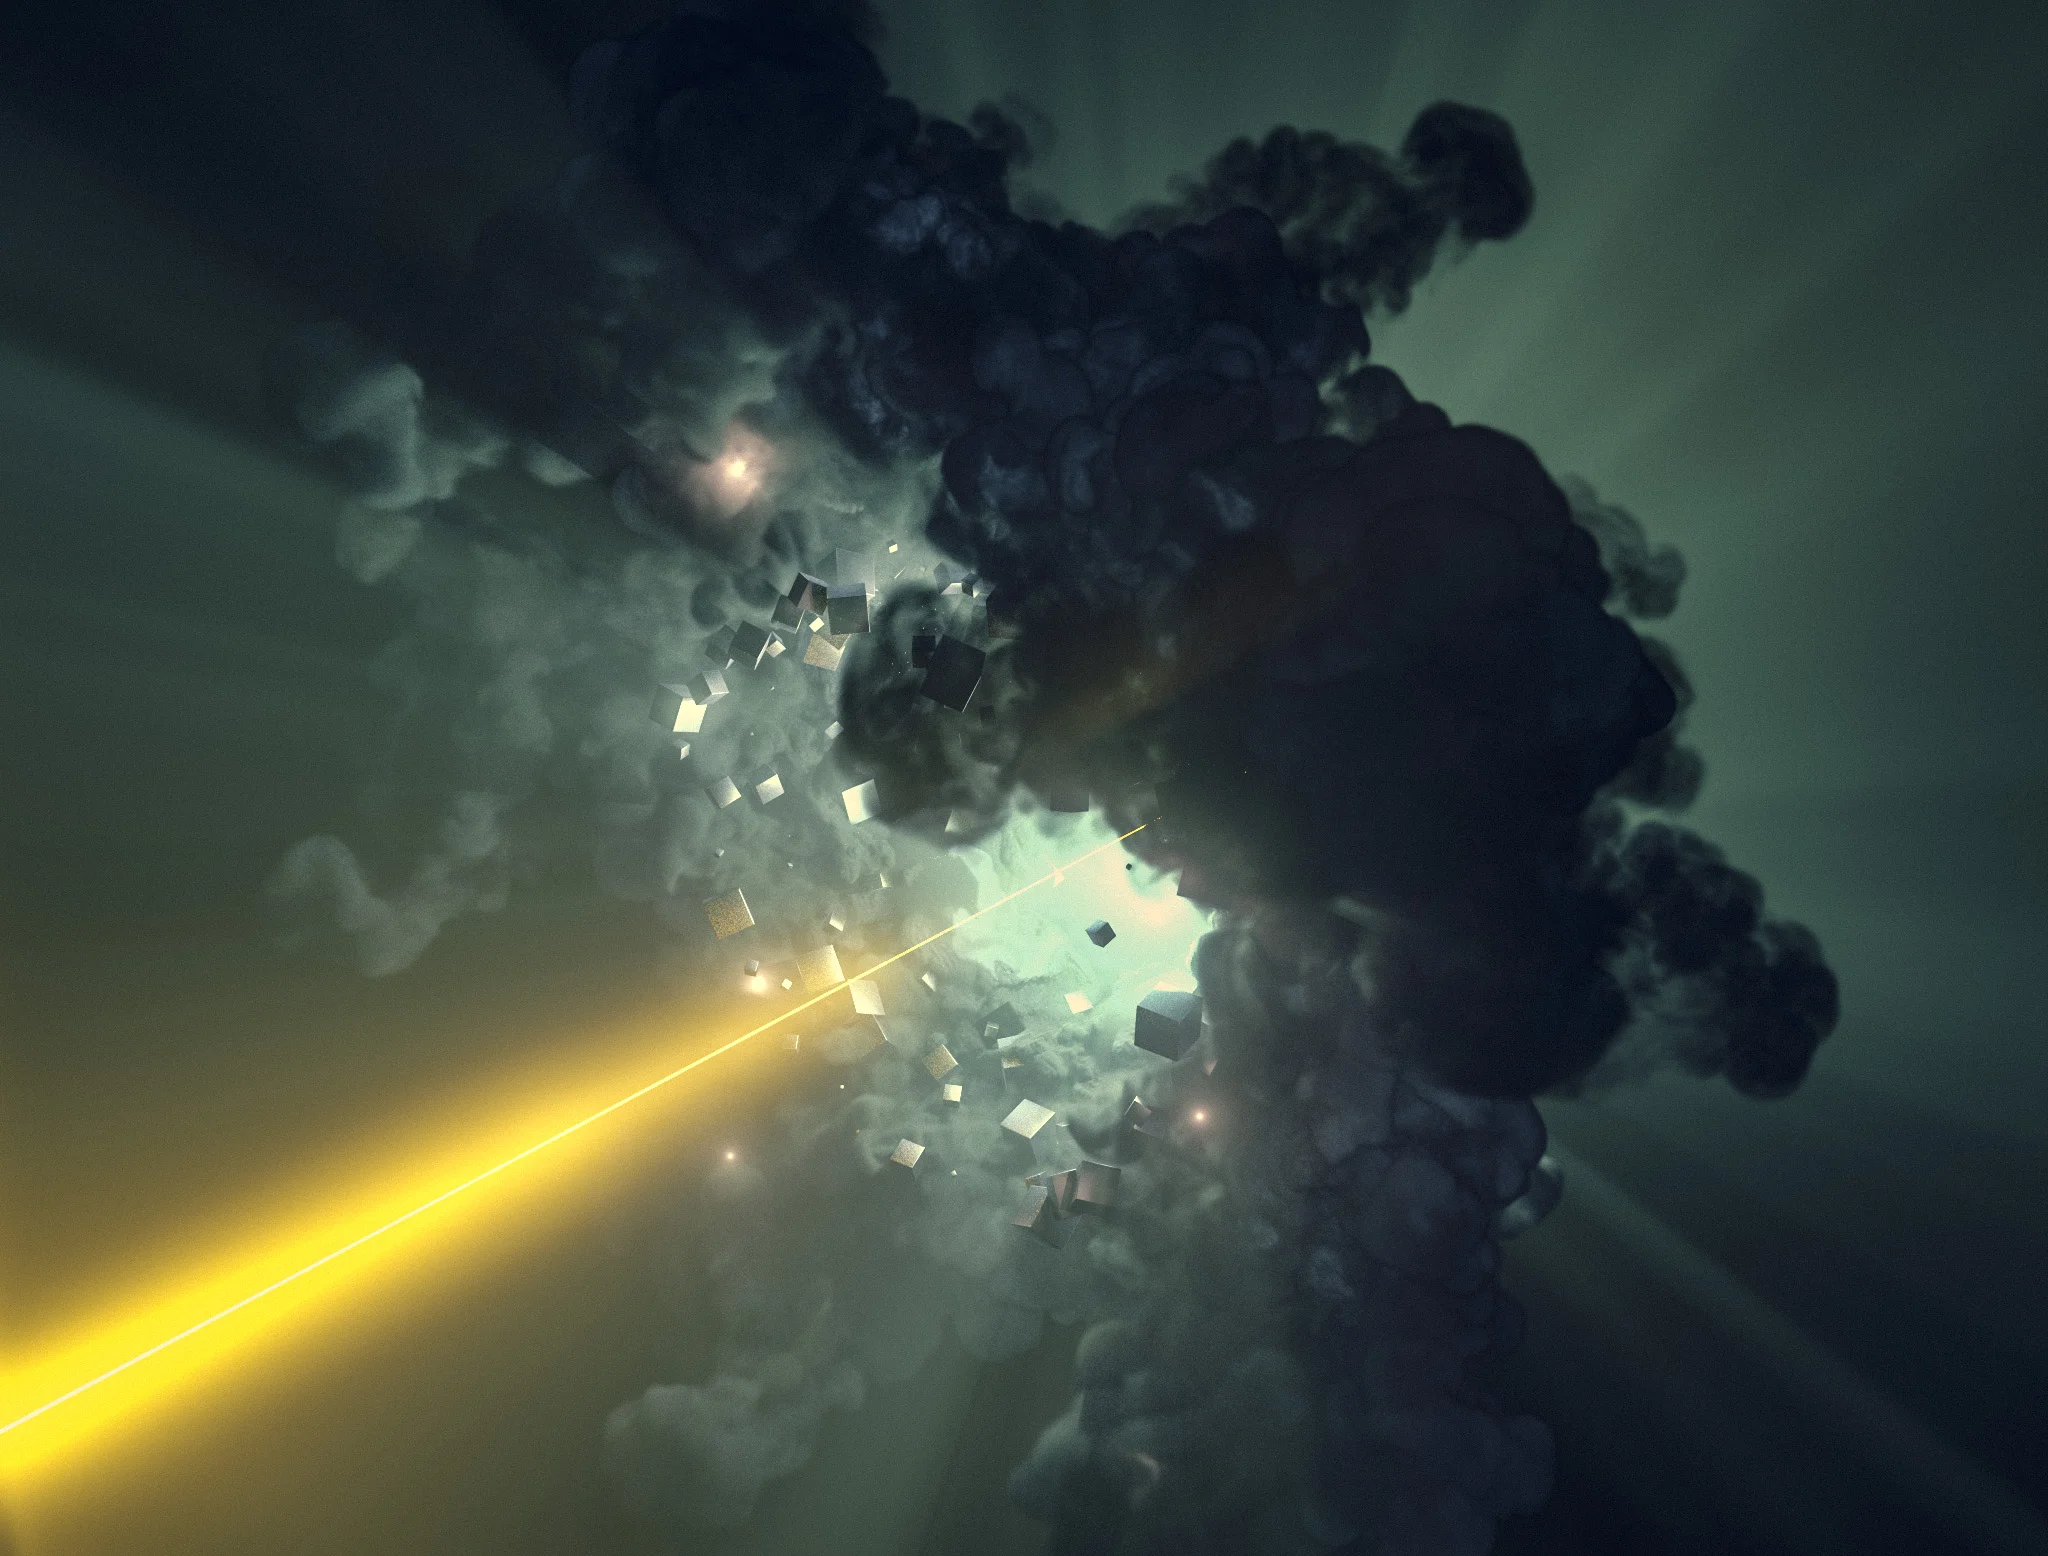
Volumetrics innnnn sppppaaaaaaaaaacccceeeeee!
Worked up a volumetric study in C4d and Redshift last night. Was interesting to put the thing in a cloner and play with it that way. The cloner idea was from that LFO Desgin class I am taking ATM. Learning a ton from that, probably one of the best classes I have purchased and I have bought a tooooon of tutorials. He really explains what everything does instead of just walking you through entering numbers. That or my brain has exploded from Houdini and I am just happy to have a damn UI again instead of coding…..


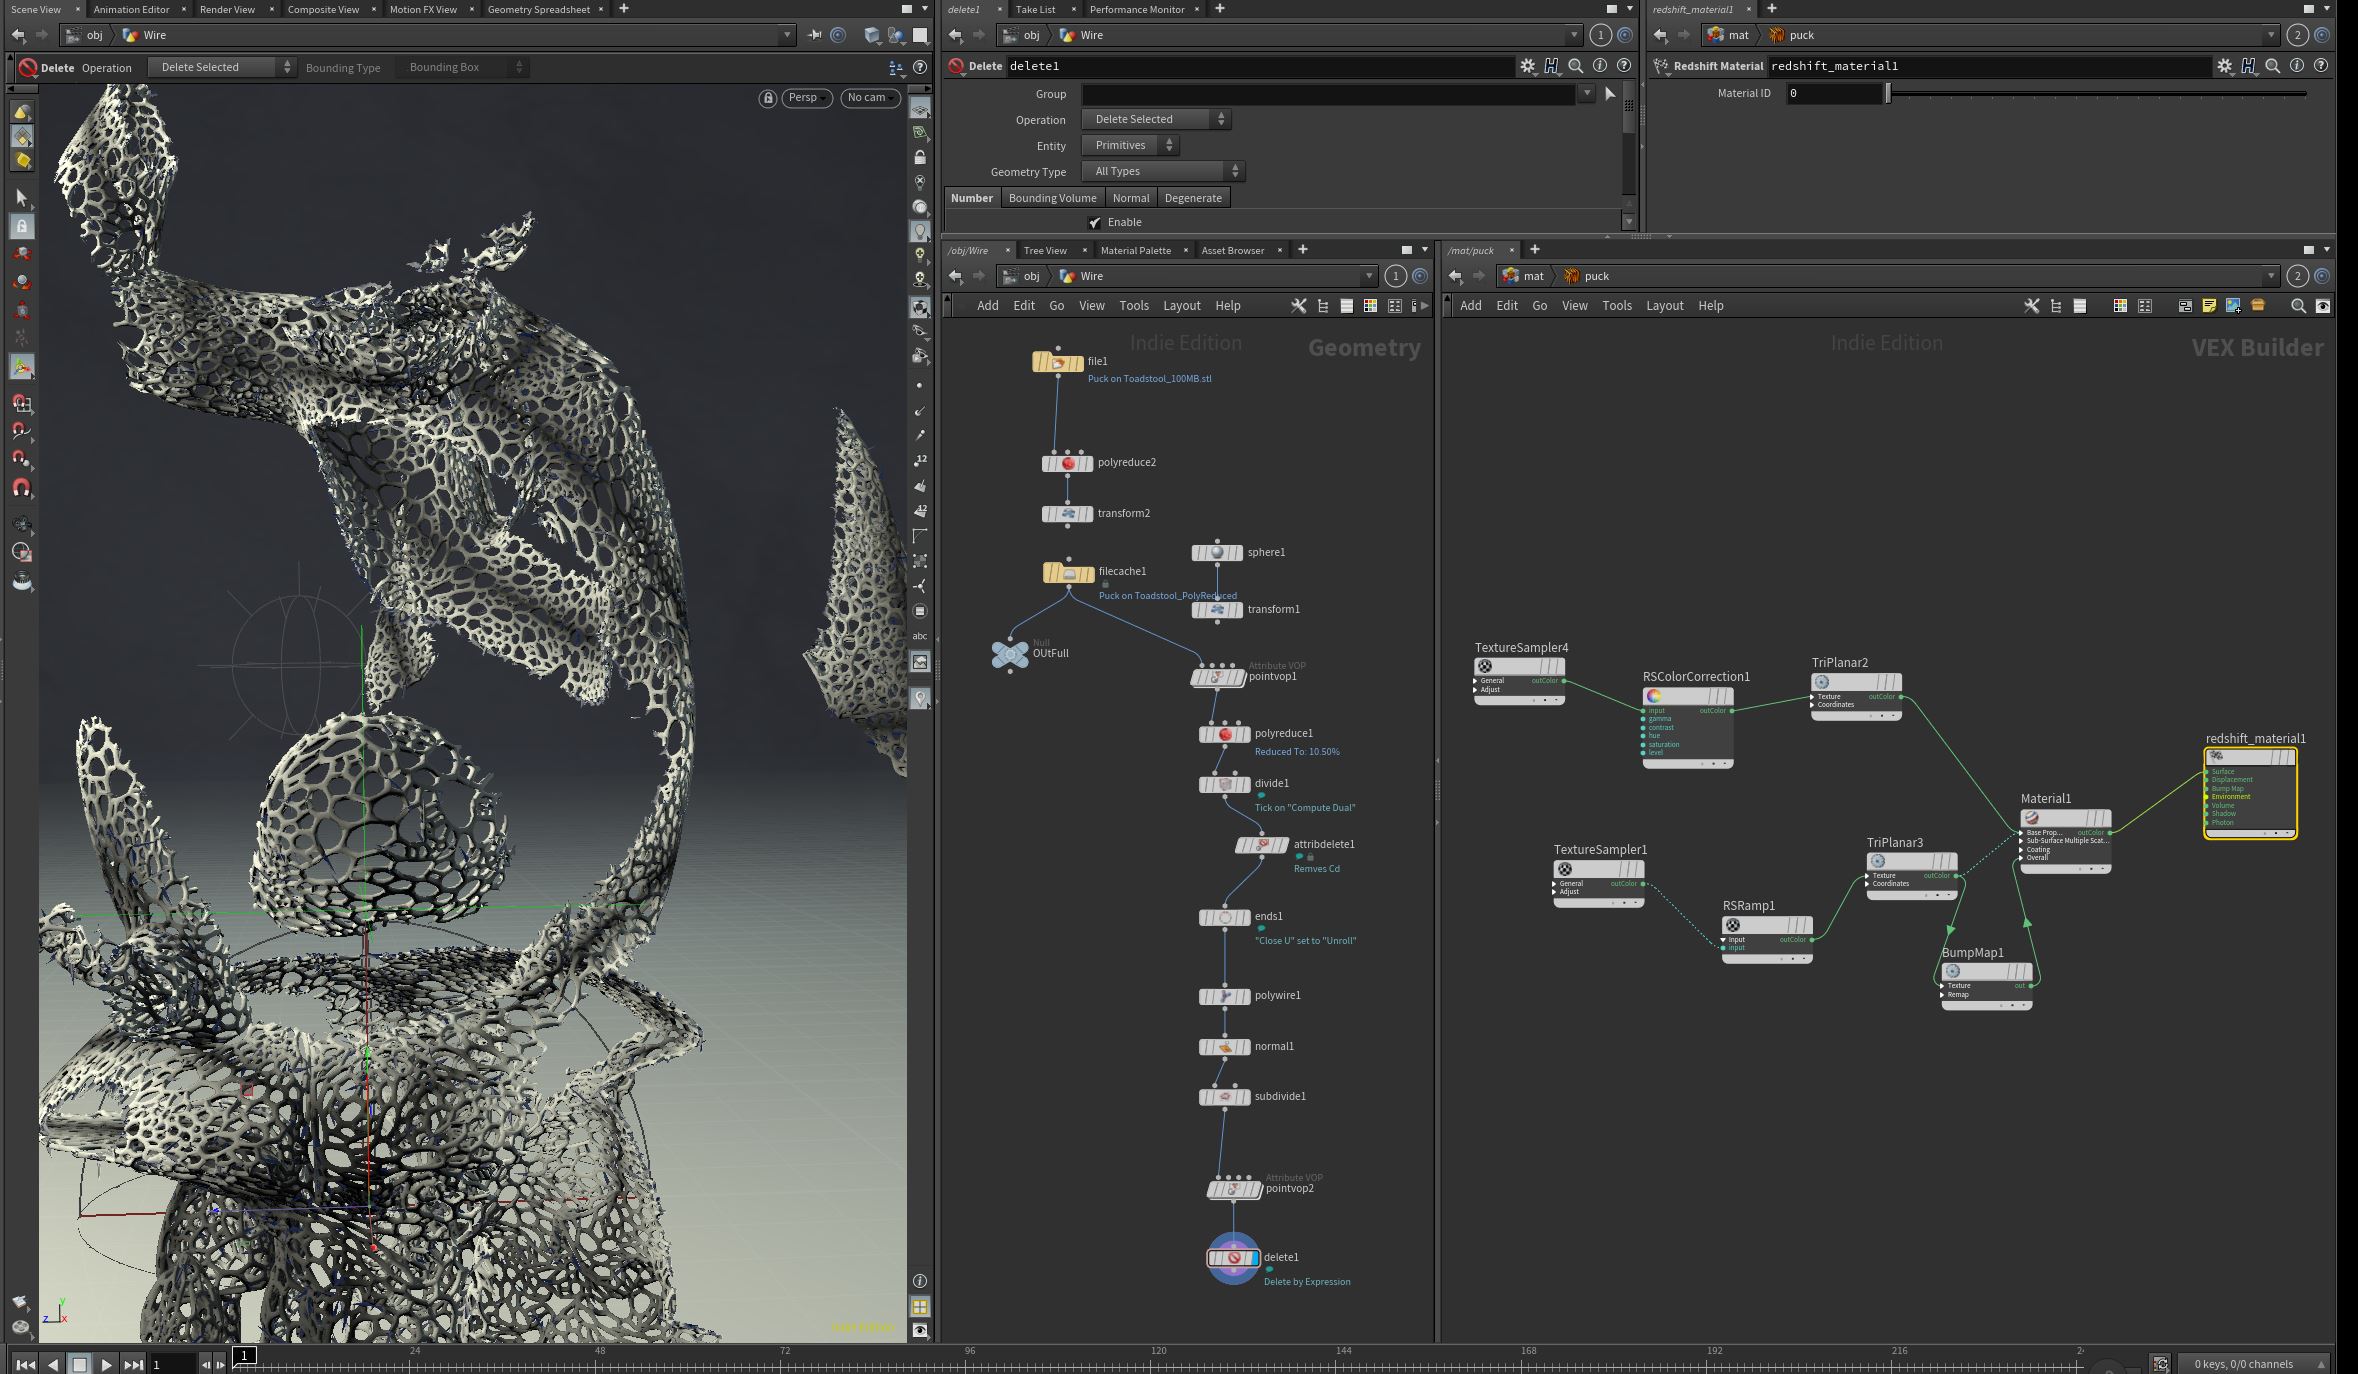
Puck in Houdini
I was following along with this Houdini live stream the other day and thought it could be interesting to apply the Redshift stuff I have been learning to it but in Houdini. I actually got it all working and built out this creepy little puck statue. You can see the nodes for tight wires and how I textured the main Puck figure in the screen shots. Did the grading in Adobe Camera Raw to finish it off and that was a wrap at 10:30 or so, lol!


Recent progress
I have continued with more RedShift in C4d and have really been enjoying it. Went back to Houdini to mess around and ran into a bug where I can’t get the lights to look at nulls. I can load the null as a target and it will track it for the first movement and then it clears the field and drops the link.
No Idea.
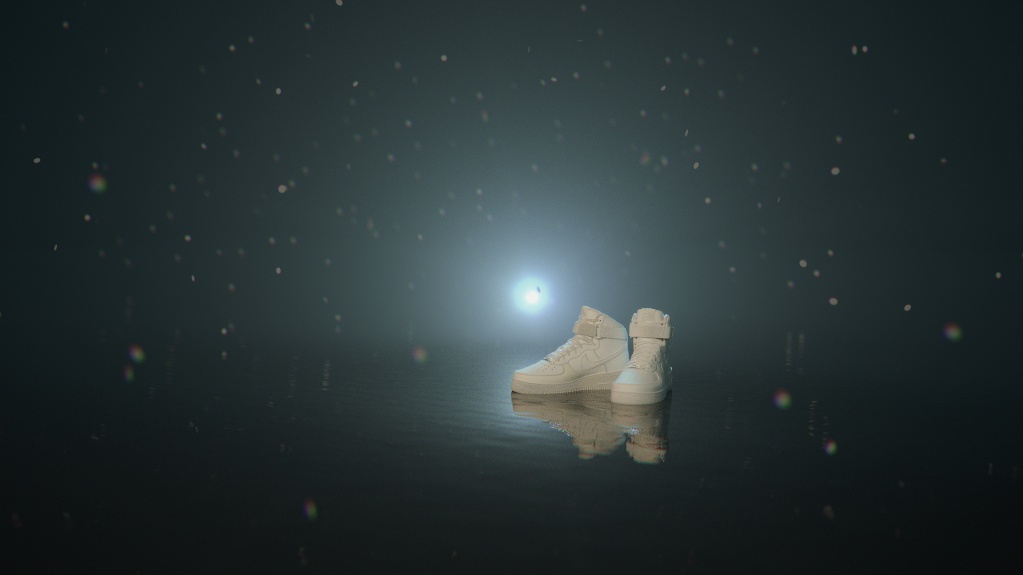
Then I tried to load a fbx file and what a freaking nightmare it is. Tried the first free solution below and it worked but a simple pair of shoes that in C4d is 4 pieces of geometry became over 150. So yeah, really frustrating. That said, being back in C4d has been really nice and easy. It’s nice not to have to break my brain to build out simple sets. So many possibilities with Houdini but it’s really frustrating to do simple ass shit.
Redshift is starting to really grow on me though. Everything works like I think it should. No abstractions or messed up ways of getting something done. Wire it up and it works. Octane is really, really easy but it does some things really quirky and non-standard. Plus, light linking is a joy in Redshift.
I will say gamma correcting scaler values is pretty abstract and should not be needed. That should be added on the programming level at the start of those channels. It is also not well documented as being needed for true representations of your textures.
Anyways, here are some of the things I have been doing along with the classes. Nothing special really but it’s nice to have a log of what I was building out. Some of these are just saved from the RenderView so I can find them later. A few are a bit more thought out ;)


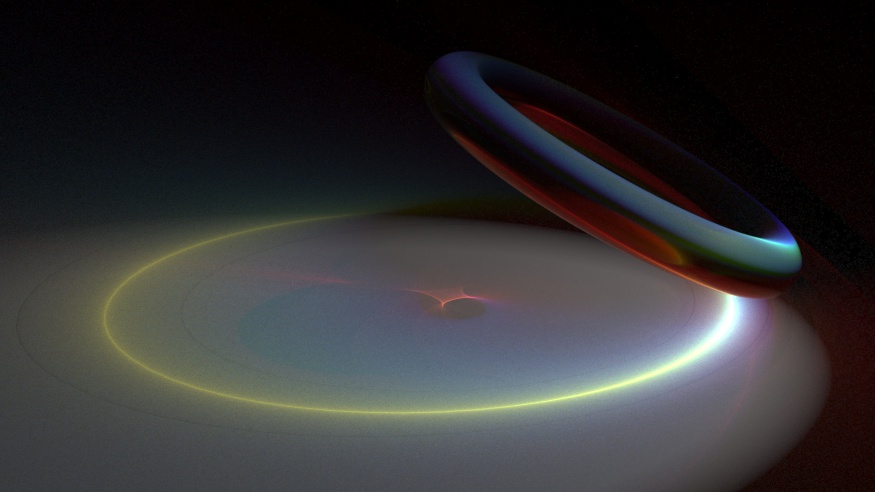


One of the nice things to make is a default three point lighting set with Nulls as targets for the lights and camera. Set your GI and change the default render settings and bango, saves 5-10 minutes at the start of everything. Highly recommend building out one of those.
Also, Ramps are really, really, really important. Like use them on all the things.
Some Houdini OBJ stuff
Had a chance to start that RedShift Lesson from LFO Design last night and I am super happy with that purchase already. Lots of good general tidbits in there. In the meantime, the MoGraph Slack has been posting a bunch of great ways to bring in OBJs into Houdini I can’t wait to test out. Here is a free method for simpler models:
And here is a method that will do more complex models and match all the materials but it’s a shelf tool you have to buy. But at $50 it’s kinda a no brainer. OD Shelf Tools.
Can’t wait to dig into both of these at some point. But for now it’s all about RedShift, Redshift and a touch of Redshift…. maybe?
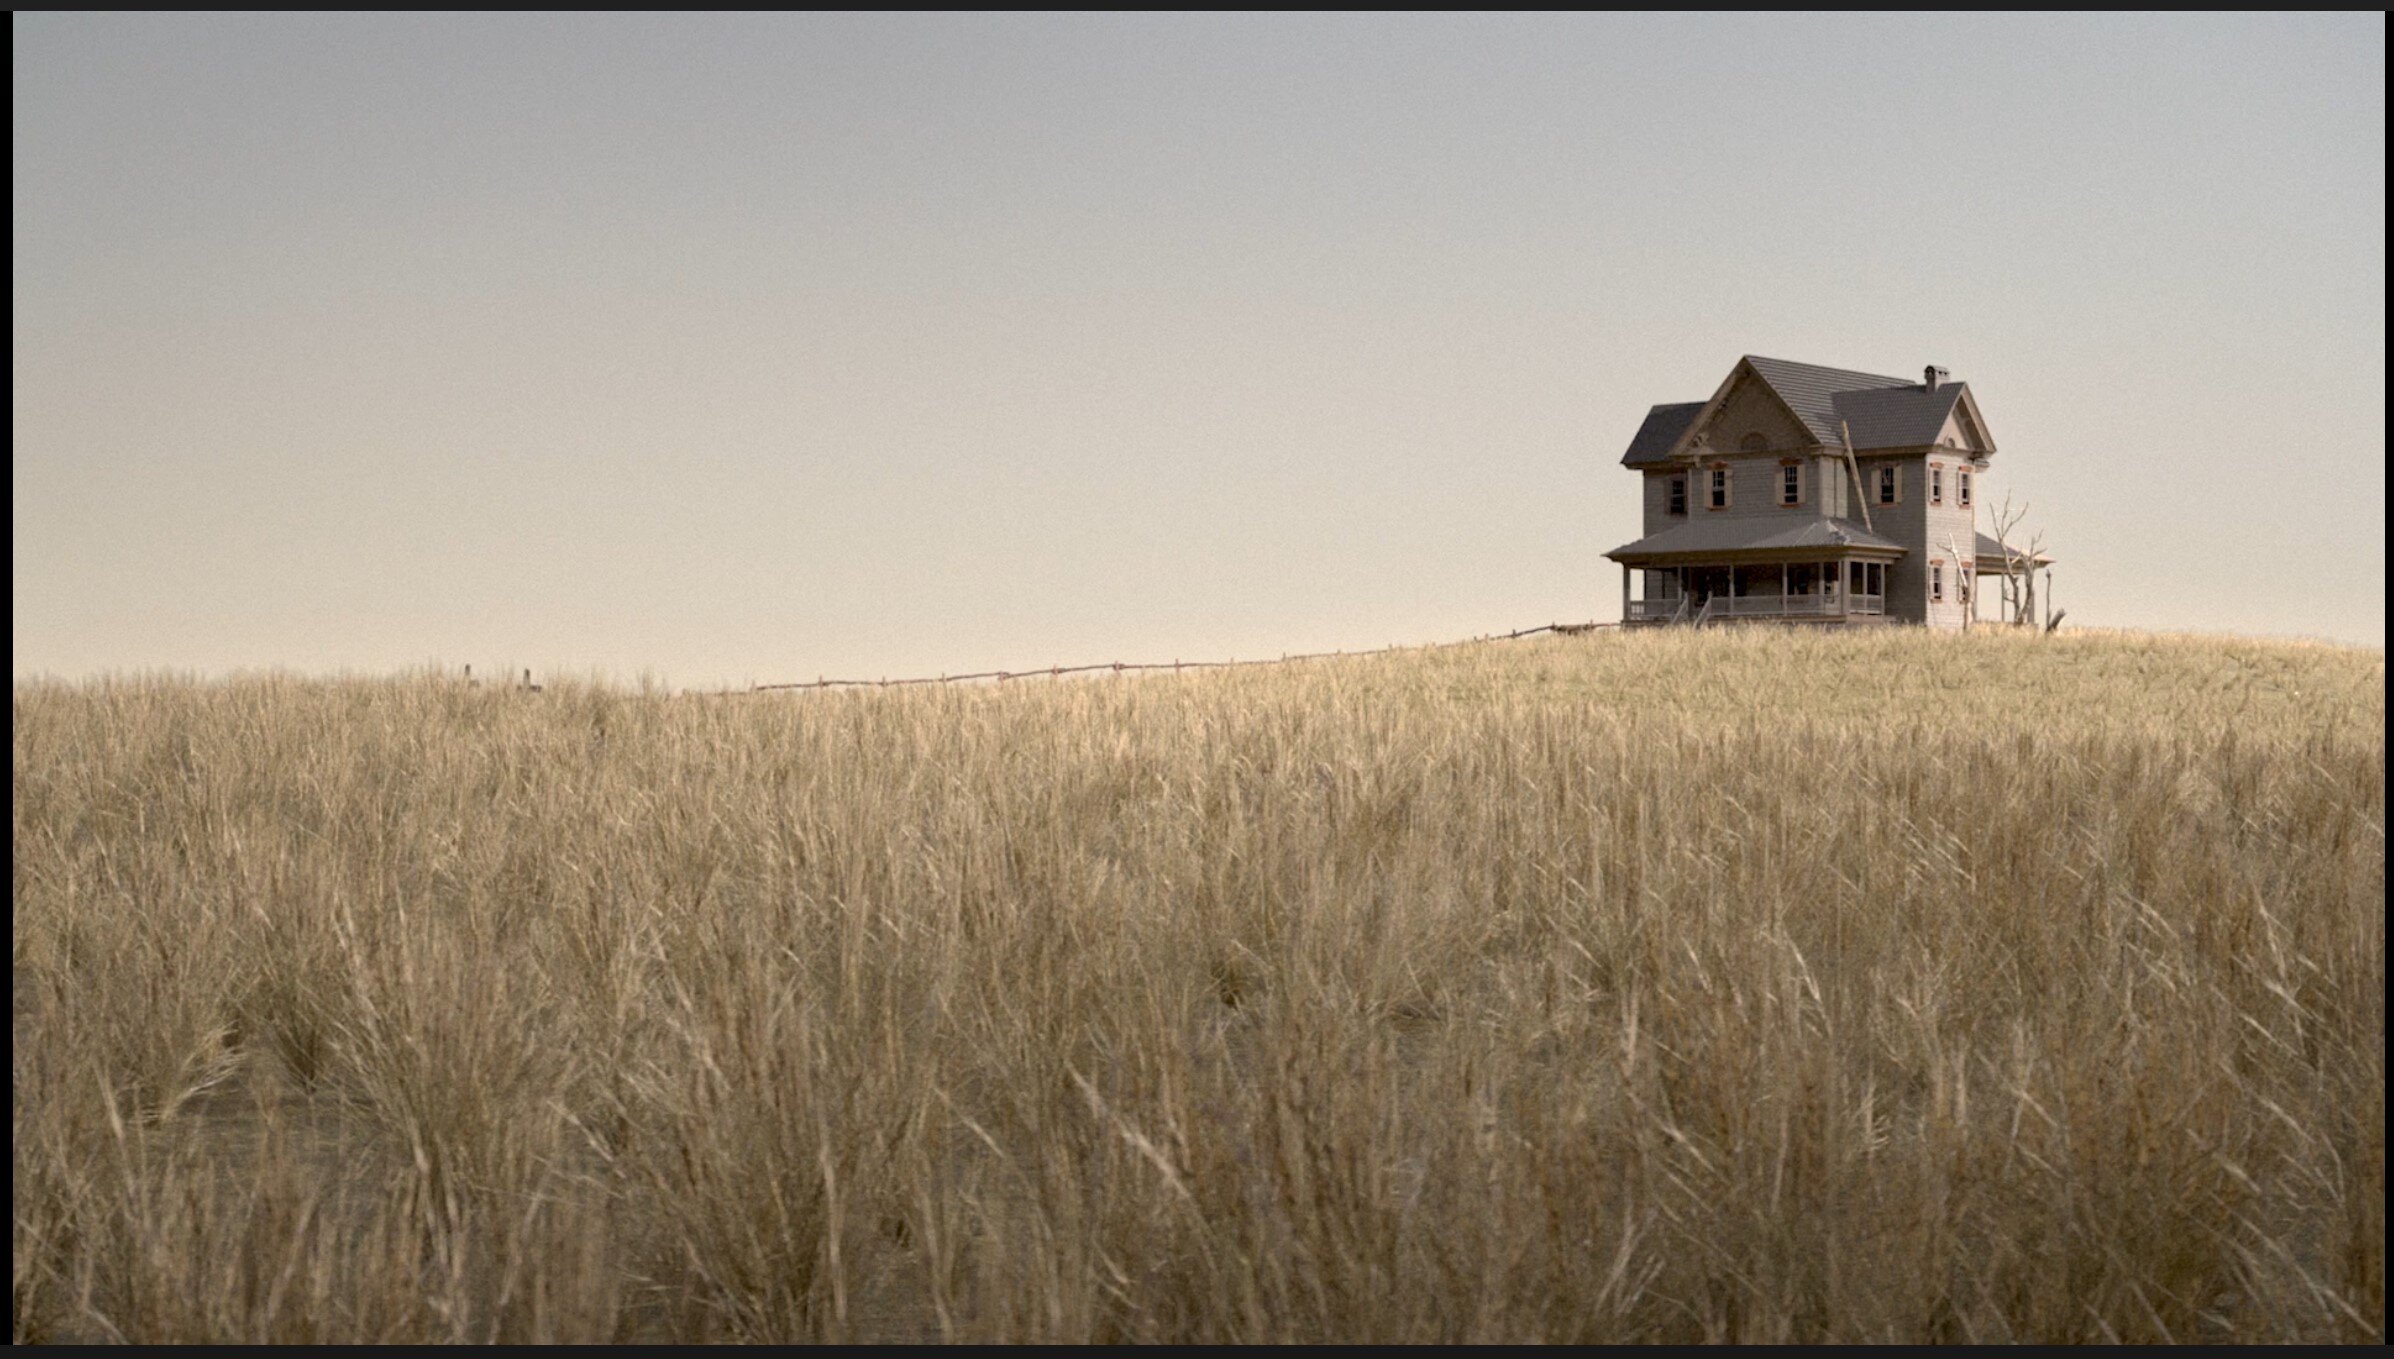
Creating a Snowy Forest in UE4- Breakdown.
Really interesting break down by Leah Augustine on how she created this landscape in UE4. A lot of interesting solutions in here.
“When creating the snow textures in Substance Designer, I also created a detail normal of simple noise that I used in conjunction with the base normal. I found that when you use subsurface you tend to visually lose normal information, flattening out your material. Since I knew I wanted close up shots, I wanted to exaggerate the normals a bit more to counteract this.
I personally think that a detail normal and subsurface scattering is what helped achieve more realistic snow for this project. Subsurface, in my opinion, really brought it all together. It helps give the snow better highlights around the edges and creates the appearance of light shining through it. Subsurface can be costly, but it does make a difference .“
I tried making some snow in Octane and C4d and failed tragically. Will have to landscapes another shot at some point.
Tuts / info: Skin materials
This post on the Modo forums go into all sorts of crazy detail about getting realistic skin shaders. It's a gold mine of ideas and information for any program, not just Modo.
"Top Layer/Skin Surface - This is pretty flat/desaturated. It's basically just the cells of your skin, most of which are dead. Although I would think this map would be colored a bit if the character/model had some darker pigmentation based on race etc. Perhaps moles/liver spots, tattoos, make up etc.
2nd Layer - This is just below the skin. Sort of a more saturated version of the surface/skin map. There is blood and active alive tissue, but for the most part, is just "more layers of skin". Perhaps moles/liver spots, tattoos etc.
3rd layer - This is where most of the color comes from. Fat, blood, muscle, connective tissues etc. This map is generally very contrasty and saturated. Really think about what elements would be contained at this level - reds and blues for veins and vessels, pinks for muscle, connective tissue - pale yellowish whites for connective tissue/tendon, darker brownish yellows etc for fat, lighter desaturated white/yellows for bone etc.
4th Layer - Backscatter map - this map is more or less a mask, dictatiing where and how light will pass through the skin material, on thinner areas like the ears, as well as the general darker, reddish coloring.
Spec/Gloss 01 - General spec/oil.
SPec/Gloss 02 - Extra shiny/wet areas, on top of the oil layer, like lips, around eyes, maybe on nose or forehead"
Tuts: Glowing objects in Modo
Some people wanted to know how to do that Tron look so here is a link to the video from Brad Peebler at the Foundry showing you all how it's done. It's shockingly easy. Plus some bonus tips on action centers that are interesting. Action centers continue to annoy me as they all have to clicked in perfect order otherwise they don't work.

Tuts: Modo 801 Render passes by Sabertooth
Really solid explanation of setting up and using Render Passes in Modo. Covers all the quirks so you can get it rolling in production.
Databending using Audacity Effects
"Following Antonio’s tutorial, you can trick Audacity in to opening an image file as a sound. Not only does this give you a sound wave which you can manipulate and bend to your will, but a lot of files sound pretty funky. A bit like if you put a Decepticon in a blender with a couple of R2 droids."
- Databending using Audacity Effects - Question Something.
This is a whole new level of awesome. Can't wait to mess with it. He goes through and shows what each effect will do to a image. This is the Wah Wah effect.